You’ve sourced LVT flooring at an attractive per-square-foot price, but a nagging concern remains: what about the hidden costs? For distributors, contractors, and importers, calculating the true final cost of a flooring project is a persistent challenge. Unexpected expenses for subfloor preparation, specialized adhesives, or labor overruns can evaporate profit margins, derail project timelines, and ultimately damage your reputation with clients. When every line item is a question mark, budgeting becomes a high-stakes guessing game.
You’re in the right place. This definitive guide deconstructs every cost component of a large-scale LVT flooring project. We will move beyond the sticker price to provide a clear, predictable, and comprehensive cost model that empowers you to budget with confidence. As a direct LVT flooring factory, we have a unique perspective on the entire supply chain and project lifecycle. We will share our insider knowledge to help you master your project finances.
Guide Overview
- The Core Component: Material Costs
- Factoring in Installation: Labor Costs
- The Foundation: Subfloor Preparation
- The Supporting Layer: Underlayment & Barriers
- Uncovering “Hidden” Fees & Other Expenses
- Putting It All Together: A Sample Project Calculation
1. The Core Component: What Are the Material Costs for LVT Flooring?
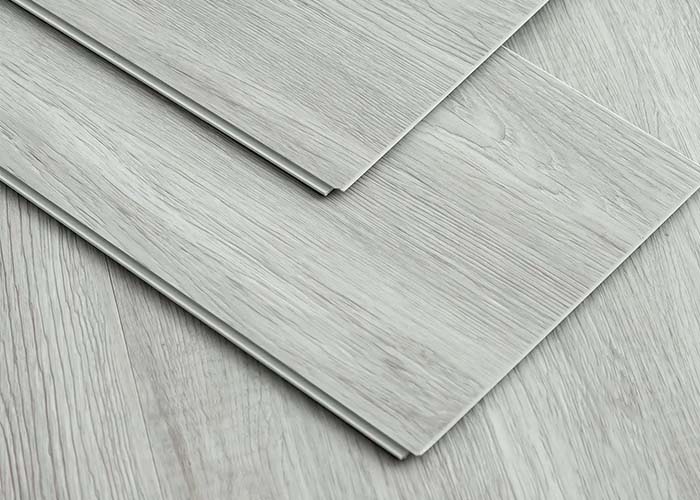
The primary cost driver for any LVT project is the flooring material itself. However, “LVT” is a broad category encompassing several product types, each with its own performance characteristics and price points. Understanding these differences is the first step in accurate budgeting.
Understanding the LVT Family: LVT, LVP, SPC, and WPC
First, let’s clarify the terminology. Luxury Vinyl Tile (LVT) and Luxury Vinyl Plank (LVP) are functionally similar, differing mainly in format (tile vs. plank). The key distinction lies in the core construction:
- Traditional LVT/LVP: Features a flexible PVC core, making it pliable and adaptable.
- Rigid Core (SPC/WPC): Features a solid, rigid core. Stone Plastic Composite (SPC) uses a core of limestone and stabilizers, while Wood Plastic Composite (WPC) uses a core of wood pulp and plasticizers.
This core difference dictates performance:
- SPC (Stone Plastic Composite): Known for its exceptional density and durability. Its primary benefit is superior dent and impact resistance, making it ideal for high-traffic commercial environments and areas with heavy furniture or equipment.
- WPC (Wood Plastic Composite): Thicker and less dense than SPC, WPC contains a foaming agent that adds air to the core. This results in a floor that is quieter, softer, and more comfortable underfoot.
- LVT/LVP (Flexible Core): Offers excellent performance and value, particularly for glue-down applications where its flexibility allows it to conform perfectly to the subfloor.
Average Material Cost Ranges Per Square Foot
The ex-factory or distributor price for LVT materials can range from 0.50to12.00 per square foot, depending on a host of factors. Here is a general breakdown by category:
- Sheet Vinyl: 0.50−1.50 / sq. ft. (The most economical option, often used in residential or low-traffic settings.)
- Standard LVT/LVP (Flexible Core): 2.00−7.00 / sq. ft. (This represents the most common range for both high-quality residential and commercial-grade products.)
- Rigid Core (SPC/WPC): Typically falls in the mid-to-high end of the standard LVT range and beyond, reflecting its advanced engineering and performance benefits.
Key Factors That Influence Material Price
For a B2B buyer, understanding what drives these price variations is critical for balancing project requirements with budget constraints.
- Wear Layer Thickness: This is arguably the most important factor for durability and cost. The wear layer is a transparent top coating that protects the printed design from scratches, scuffs, and stains. It’s measured in mils (1 mil = 0.001 inch). A thin 6-mil layer might suffice for a low-traffic residential space, but a commercial project demands a 20-mil layer or thicker. This increased thickness significantly raises the cost but is non-negotiable for ensuring longevity.
- Overall Plank/Tile Thickness: Thicker planks (e.g., 5mm vs. 3mm) often feel more substantial and rigid underfoot, contributing to a perception of higher quality and a higher price tag. For rigid core products, thickness also impacts the product’s acoustic properties and comfort.
- Visuals & Texture: The sophistication of the design layer impacts cost. Basic prints are economical, while high-definition visuals that flawlessly replicate wood or stone are more expensive. The most premium feature is registered embossing, where the surface texture is precisely aligned with the underlying visual pattern, creating a hyper-realistic look and feel.
- Core Technology: As noted, SPC and WPC cores are more complex to manufacture than traditional flexible PVC cores. Their enhanced stability, dent resistance, and waterproof properties command a higher price.
2. How Much Does Professional Installation Labor Cost?
Labor is typically the second-largest expense category. Costs vary based on the pricing model, installation method, and project complexity.
Typical Labor Rates: Per Square Foot vs. Hourly
Installers generally price their services in one of two ways. The most common model for large commercial projects is a per-square-foot rate.
- Average Professional Installation Cost: 2.50to8.00 per square foot.
- Average Hourly Rate: 30to60 per hour. (This is more common for smaller jobs or complex repair work).
How Installation Method Dictates Your Cost
The chosen installation method is a major variable in the final labor bill. The total installed cost (material + labor) reflects this:
- Peel-and-Stick (Self-Adhesive): ~3.00−7.00 / sq. ft. This is the least labor-intensive method, as the adhesive is pre-applied. While simple, it is generally reserved for light-duty applications and is not common in demanding commercial spaces.
- Floating Floor (Click-Lock): ~4.50−8.00 / sq. ft. This is the most popular method for rigid core products (SPC/WPC). Planks lock together without being adhered to the subfloor. It offers a good balance of speed and performance.
- Glue-Down: ~5.00−10.00 / sq. ft. This method involves adhering each plank or tile directly to the subfloor with a specialized adhesive. It is the most time-consuming and skill-intensive method, resulting in the highest labor cost. However, it delivers unmatched stability and is the preferred choice for high-traffic commercial settings, areas with rolling loads, and spaces exposed to significant temperature fluctuations.
Other Factors Affecting Labor Charges
Beyond the installation method, several other factors can increase labor costs:
- Geographic Location: Labor rates are significantly higher in major metropolitan areas and regions with a high cost of living compared to rural areas.
- Project Complexity: Installers will charge more for work that requires extra time and precision. This includes installing flooring on stairs, creating intricate patterns like herringbone or chevron, and working in small, confined spaces (e.g., closets, multi-room offices) that require numerous cuts.
3. What Are the Costs of Preparing the Subfloor?
This is the most frequently overlooked cost category and the one most likely to cause budget overruns. A flawless installation depends entirely on a perfectly prepared subfloor.
Why a Perfect Subfloor is Non-Negotiable
Any imperfections in the subfloor—dips, bumps, cracks, or debris—will eventually telegraph through to the surface of the LVT. This leads to an unprofessional, uneven appearance, creates weak points that can lead to premature wear, and can even cause click-lock systems to fail or glue-down adhesives to de-bond. Investing in proper preparation is not an option; it’s a requirement for a successful, long-lasting floor.
Common Subfloor Prep Tasks and Their Costs
Budgeting for these items is essential for any project that isn’t new construction.
| Preparation Task | Average Cost (per sq. ft.) | Notes |
|---|---|---|
| Old Flooring Removal & Disposal | 1.00−4.00 | Carpet is relatively easy to remove. Old vinyl or tile, especially if glued down, is far more labor-intensive and costly to remove and dispose of. |
| Subfloor Leveling/Grinding | Varies Widely | This is often quoted on a per-project basis. Grinding concrete high spots or applying a cement-based self-leveling compound to fill low spots can cost 1.85−7.40 per sq. ft. in some markets. |
| Major Subfloor Repair | Project-Specific | Replacing sections of water-damaged or rotten plywood is a significant structural repair and will be quoted as a separate, substantial line item. |
| Minor Repairs & Cleaning | Usually Included in Labor | Basic sweeping, vacuuming, and filling minor cracks are typically part of the standard installation fee. |
4. Should You Budget for Underlayment and Vapor Barriers?
The need for these supporting layers depends on the product chosen and the subfloor type.
To Underlay or Not to Underlay?
The modern rule is straightforward: Most rigid core LVT (SPC and WPC) products come with a pre-attached underlayment pad and do not require a separate one. Adding another layer can actually compromise the stability of the locking system.
An exception exists when installing a product without an attached pad (like many glue-down LVTs or some click-lock versions) where extra sound dampening or cushioning is desired. Always consult the manufacturer’s specifications. If a separate underlayment is needed, budget 0.15to0.80 per square foot for the material.
Protecting Your Investment with a Vapor Barrier
A vapor barrier (typically 6-mil polyethylene sheeting) is mandatory when installing a floating floor over a concrete subfloor, especially in below-grade (basement) applications or any other moisture-prone environment. Its purpose is to prevent moisture vapor from the concrete slab from becoming trapped beneath the flooring, which can lead to mold, mildew, and the eventual breakdown of the flooring core. This is an inexpensive but critical insurance policy.
- Average Cost: Budget 100to150 per room for a professionally installed vapor barrier.
5. What Other “Hidden” Expenses Should Be in Your Budget?
A truly comprehensive budget accounts for all the miscellaneous items that are easy to forget but add up quickly.
A Checklist of Additional Charges
- Material Wastage: No project uses exactly the amount of flooring ordered. You must account for cuts, angles, and potential mistakes. The industry standard is to order 5-10% extra material. For complex layouts with diagonal patterns, this can rise to 15%.
- Adhesives: For a glue-down installation, the adhesive is a separate material cost. The type and amount needed will be specified by the flooring manufacturer.
- Transition Strips: T-molding, reducers, and end caps are needed to create a clean finish between different flooring types (e.g., LVT to carpet) or at doorways. Budget 5to30 per strip.
- Moving Furniture: Installers will charge a fee to move furniture out of the space and back in again. This is often quoted per room or as an hourly rate.
- Shipping & Logistics: For distributors and importers, this is a major expense. Ocean freight, customs duties, port fees, and domestic transportation from the port to the warehouse are not included in the ex-factory material price and must be calculated separately.
- Disposal Fees: Hauling away old flooring, packaging, and construction debris incurs a cost, which is often passed on to the client as a flat fee.
6. A Practical Example: Calculating Your Total Project Cost
Let’s synthesize this information into a sample project to see how the per-square-foot cost evolves from the material price to the all-in project total.
Sample Project: 2,000 sq. ft. Commercial Office Space
- Flooring Type: Mid-grade glue-down LVP with a 20-mil wear layer.
- Subfloor: Concrete slab in good condition, requiring minor leveling.
- Layout: Open-plan office with a few individual rooms, requiring transitions.
Itemized Cost Breakdown Table
This example clearly illustrates how a material priced at 3.50/sq.ft.∗∗resultsinatrue,all−inprojectcostof∗∗7.53/sq. ft.
| Cost Item | Unit | Quantity | Cost Per Unit | Total Cost |
|---|---|---|---|---|
| LVT Material (Mid-Grade) | sq. ft. | 2,000 | $3.50 | $7,000 |
| Material Wastage (7%) | sq. ft. | 140 | $3.50 | $490 |
| Vapor Barrier | sq. ft. | 2,000 | $0.20 | $400 |
| Flooring Adhesive | Pail | 5 | $60.00 | $300 |
| Subfloor Leveling (Minor) | Project | 1 | $500.00 | $500 |
| Installation Labor (Glue-Down) | sq. ft. | 2,000 | $3.00 | $6,000 |
| Transition Strips | Each | 6 | $20.00 | $120 |
| Debris Disposal Fee | Project | 1 | $250.00 | $250 |
| ESTIMATED TOTAL | – | – | – | $15,060 |
| ESTIMATED TOTAL / SQ. FT. | – | – | – | $7.53 |
Conclusion
As we have demonstrated, the true cost of an LVT flooring project is a sum of its parts: the core material, the installation labor, the critical prep work, and a checklist of miscellaneous expenses. The initial per-square-foot material price is merely the starting point of your calculation.
The key takeaway is to look beyond the sticker price. By systematically understanding, anticipating, and budgeting for every component, you transform a potentially risky purchase into a predictable, profitable, and successful investment. This diligent approach protects your margins, ensures on-time project delivery, and builds trust with your end clients.
Don’t leave your next project’s budget to chance. If you require a precise, all-inclusive quote based on transparent, factory-direct pricing, contact our flooring experts at Boyu today. We are here to ensure there are no surprises from factory to final installation.
Frequently Asked Questions (FAQ)
Q1: Is glue-down or click-lock LVT more expensive to install? A: Glue-down LVT is typically more expensive to install. The process is more labor-intensive, requiring meticulous subfloor prep and careful application of adhesive, which is also an added material cost. Labor for glue-down can easily be 1−2 more per square foot than for a comparable click-lock installation.
Q2: How much extra should I budget for waste and unforeseen costs? A: A safe and professional rule of thumb is to add a 10-15% contingency to your total estimated project cost. This covers the standard material wastage allowance (5-10%) plus an additional buffer for unforeseen subfloor issues or other minor expenses that may arise during the project.
Q3: Can I save money by installing LVT directly over an existing floor? A: Sometimes, but proceed with caution. You can often install a floating LVT floor over existing hard surfaces like ceramic tile, sheet vinyl, or even hardwood, provided the existing floor is perfectly flat, clean, and structurally sound. This saves on demolition and disposal costs. However, you can never install LVT over soft flooring like carpet. Always verify that the existing surface meets the LVT manufacturer’s requirements for a new installation.
Q4: What’s the main cost difference between standard LVT and premium SPC/WPC? A: The main cost difference lies in the core material and manufacturing process. The rigid cores in SPC (stone composite) and WPC (wood composite) are more technologically advanced, offering superior dimensional stability and dent resistance. This engineering places their material cost in the mid-to-upper end of the LVT spectrum, often 1−3 more per square foot than a basic flexible-core LVT of similar thickness and wear layer.
Q5: Does a thicker wear layer significantly increase the cost? A: Yes, absolutely. The wear layer is a critical performance component, and its thickness is a primary driver of cost. Moving from a residential-grade wear layer (e.g., 6-12 mil) to a light-commercial (20 mil) or heavy-commercial (28-40 mil) grade can increase the material cost by 25-50% or more. While it’s a significant price jump, it is an essential investment for ensuring the floor’s lifespan in any commercial environment.