
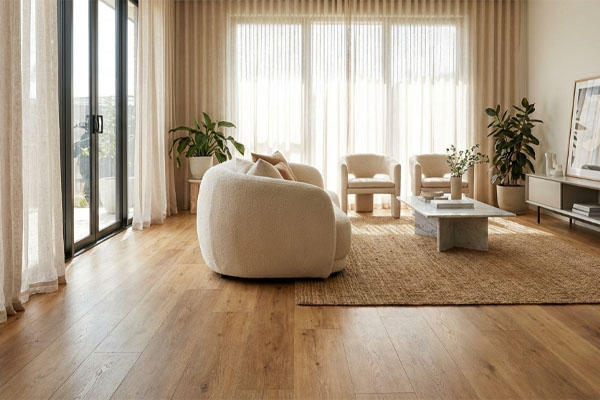
Successful installation of lifeproof waterproof rigid core vinyl plank flooring depends on following a precise click-lock sequence and maintaining a consistent expansion gap. Many contractors face the frustration of buckling floors or separated joints shortly after a project completes. By utilizing the right preparation techniques, you can ensure a durable, high-end finish that stands up to heavy foot traffic. We provide the professional-grade lifeproof waterproof rigid core vinyl plank flooring solutions your business needs to guarantee client satisfaction every time.
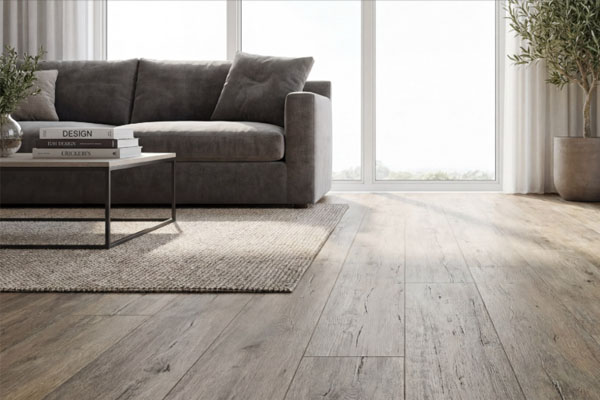
How to prep for lifeproof waterproof rigid core vinyl plank flooring?
Preparing your subfloor involves ensuring it is level, dry, and free of debris before the first plank is laid. When you select high-quality lifeproof waterproof rigid core vinyl plank flooring , the foundation determines the longevity of the entire installation. Any deviation in the subfloor greater than 3/16 of an inch over a 10-foot span can stress the locking mechanisms.
Why is floor leveling critical for you?
You need to identify high spots and low areas using a long straightedge before proceeding with the layout. Make no mistake: skipping the leveling process is the leading cause of “hollow” sounding spots in B2B flooring projects.
- Use self-leveling compound for concrete dips.
- Sand down high spots on plywood subfloors.
- Vacuum the entire area to remove grit that could crunch underfoot.
Should you check moisture levels first?
The best part? Rigid core products are waterproof, but your subfloor might still harbor moisture that affects the building’s air quality. You should always perform a moisture test to ensure your site conditions meet professional standards.
- Check concrete for a moisture vapor emission rate.
- Ensure wood subfloors are within 2% of the plank moisture content.
- Address any leaks or drainage issues before installing.
Key Takeaway: Subfloor preparation is the most labor-intensive but vital phase of a professional flooring project.
| Prep Step | Requirement | Tool Needed | |
|---|---|---|---|
| Levelness | < 3/16″ per 10′ | 10-foot Straightedge | |
| Cleanliness | Dust and Grit Free | Industrial Vacuum | |
| Moisture | Within Spec | Moisture Meter |
This guide emphasizes that mechanical stability starts with a perfectly flat and dry mounting surface.
What tools for lifeproof waterproof rigid core vinyl plank flooring?
The correct toolset includes a tapping block, pull bar, rubber mallet, and a fine-tooth saw for precision cuts. Using specialized equipment for lifeproof waterproof rigid core vinyl plank flooring ensures that you do not damage the delicate tongue-and-groove edges during the assembly process.
Which cutting tools do you need?
You will find that a simple utility knife is often enough for straight scores, but a miter saw offers cleaner results for complex corners. Here is the kicker: using the wrong blade can lead to chipping of the decorative wear layer.
- Use a square to guide your utility knife scores.
- Employ a jigsaw for “U” shaped cuts around door jambs.
- Keep extra blades on hand to maintain a sharp, clean edge.
Is a tapping block essential for you?
You must avoid hitting the planks directly with a hammer to prevent cracking the rigid core structure. Believe it or not, a professional tapping block distributes the force evenly across the joint for a tighter seal.
- Use a high-density plastic tapping block.
- Secure a heavy-duty pull bar for the final row.
- Carry a non-marking rubber mallet to prevent scuffs.
Key Takeaway: Investing in specialized vinyl installation tools reduces material waste and speeds up the labor timeline.
| Tool Name | Primary Function | B2B Benefit | |
|---|---|---|---|
| Pull Bar | Tightens End Joints | Reaches tight wall gaps | |
| Tapping Block | Seats Planks Safely | Protects locking system | |
| Spacers | Maintains Expansion | Prevents future buckling |
Proper tool selection transforms a difficult manual task into a streamlined, repeatable professional process.
Can lifeproof waterproof rigid core vinyl plank flooring go over tile?
Yes, you can install this flooring over existing ceramic tile provided the grout lines are not excessively deep or wide. Many commercial renovations favor lifeproof waterproof rigid core vinyl plank flooring because it allows for a fast “overlay” that avoids the cost of demolition.
How do you handle deep grout lines?
You must fill grout lines that exceed 1/4 inch in width to prevent the “telegraphing” of the pattern through the new floor. Think about it: over time, a rigid core can settle into wide gaps, causing the surface to look uneven under bright lighting.
- Apply a high-quality floor patch to wide grout joints.
- Ensure the tile is firmly bonded to the subfloor.
- Remove any loose or cracked tiles before starting.
Will the extra height affect your doors?
You need to measure the vertical clearance of all existing doors and entryways before committing to an overlay. But wait, there’s more: adding a new layer of rigid core over tile can raise the floor height by up to 10mm.
- Plan for transition strips at every doorway.
- Trim the bottom of wood door casings if necessary.
- Verify that appliances will still fit under cabinetry.
Key Takeaway: Overlays on tile save significant time and money if the existing surface is stable and grout lines are filled.
| Factor | Requirement | Recommendation | |
|---|---|---|---|
| Grout Width | < 1/4 Inch | Fill if wider | |
| Tile Bond | 100% Secure | Remove loose pieces | |
| Thresholds | Transitions | Use T-Molding |
Analysis of site height constraints is mandatory when performing an overlay to ensure seamless facility transitions.
Is acclimation required for lifeproof waterproof rigid core vinyl plank flooring?
Professional standards suggest acclimating the planks for 48 hours in the room where they will be installed to reach equilibrium. While lifeproof waterproof rigid core vinyl plank flooring is highly stable, the surrounding air temperature affects the ease of the click-lock engagement.

What temperature do you need to maintain?
You should keep the installation site between 65°F and 85°F for at least two days before, during, and after the project. The secret is: consistent temperature prevents the material from being too brittle or too flexible during the locking phase.
- Cross-stack the boxes to allow airflow.
- Avoid storing boxes in unheated garages or vans.
- Check the site HVAC system to ensure it is operational.
Can you install immediately in emergencies?
You might be tempted to skip acclimation on tight deadlines, but this increases the risk of joint failure later. It is common knowledge that drastic temperature swings immediately after installation can cause minor shifts in the layout.
- Plan your logistics to include a 48-hour “rest” period.
- Document the site temperature for warranty compliance.
- Keep planks away from direct sunlight during acclimation.
Key Takeaway: Controlled acclimation ensures the material behaves predictably during the critical locking and cutting stages.
| Condition | Ideal Range | Impact of Deviation | |
|---|---|---|---|
| Site Temp | 65°F – 85°F | Brittle locking tabs | |
| Time | 48 Hours | Expansion stress | |
| Storage | Flat / Stacked | Plank warping |
Following a strict climate control protocol protects the integrity of the rigid core’s multi-layered construction.
How to start lifeproof waterproof rigid core vinyl plank flooring rows?
Starting your first row involves checking the room for squareness and establishing a 1/4 inch expansion gap against the wall. When working with lifeproof waterproof rigid core vinyl plank flooring , the orientation of the first row dictates the alignment for the entire facility.
How do you calculate the starting width?
You need to measure the width of the room and divide by the plank width to ensure your final row isn’t a tiny sliver. That’s not all: if the final row would be less than two inches wide, you must trim the first row to balance the room.
- Mark a chalk line to keep the first row straight.
- Use plastic spacers to maintain the expansion gap.
- Cut the tongue off the planks facing the starting wall.
Why is row staggering important for you?
You must stagger the end joints of adjacent rows by at least 8 inches to provide structural strength to the floor. Here’s the deal: a “H-joint” or “step” pattern looks unprofessional and creates weak points in the locking system.
- Use the cut piece from the previous row to start the next.
- Ensure the starter piece is at least 8 inches long.
- Avoid repeating the same stagger pattern every other row.
Key Takeaway: A calculated start prevents narrow finishing planks and ensures a visually balanced, structurally sound layout.
| Metric | Minimum Value | Purpose | |
|---|---|---|---|
| End Stagger | 8 Inches | Joint Strength | |
| Starter Plank | 8 Inches | Stability | |
| Expansion Gap | 1/4 Inch | Material Movement |
Successful layouts begin with mathematical precision rather than immediate placement to avoid late-stage corrections.
Should you use underlay with lifeproof waterproof rigid core vinyl plank flooring?
Most rigid core products come with a pre-attached IXPE or EVA underlayment, so adding an extra layer is usually unnecessary and discouraged. Using too much padding under lifeproof waterproof rigid core vinyl plank flooring can actually cause the click-lock joints to bounce and break under pressure.
Does the attached pad provide sound dampening?
You will find that the integrated padding is designed specifically to meet IIC and STC sound ratings for multi-story commercial buildings. Truth be told, adding a second thick underlayment creates a “spongy” feel that leads to joint separation.
- Check the product specifications for the IIC rating.
- Ensure the subfloor is smooth enough for the attached pad.
- Use a vapor barrier only if installing over concrete.
When do you need a vapor barrier?
You should use a 6-mil poly film if your installation is on a concrete slab to prevent moisture from reaching the plank core. The kicker is: while the planks are waterproof, trapped moisture can lead to mold growth beneath the flooring.
- Overlap poly film seams by at least 6 inches.
- Tape the seams with moisture-resistant tape.
- Run the film slightly up the wall behind the baseboards.
Key Takeaway: Integrated underlayments are engineered for optimal performance; avoid adding extra cushions that compromise joint stability.
| Underlay Type | Compatibility | Best Use Case | |
|---|---|---|---|
| Pre-attached | High | Standard Install | |
| 6-mil Poly | High | Concrete Slabs | |
| Soft Foam | Low | Avoid entirely |
Technical specifications usually dictate that the “less is more” approach applies to secondary underlayment layers.
How to cut lifeproof waterproof rigid core vinyl plank flooring accurately?
The “score and snap” method is the most efficient way to make straight cuts across the width of the plank. For your lifeproof waterproof rigid core vinyl plank flooring project, using a sharp blade and a heavy-duty square ensures that your end joints remain perfectly flush.
How do you perform a score and snap?
You need to pull your utility knife firmly across the decorative surface several times using a straight edge as a guide. Here is the best part: once the wear layer and core are scored, a quick downward snap will give you a clean break.
- Score at least three times for thick rigid cores.
- Snap the plank over the edge of a table or your knee.
- Cut the attached underlayment from the back after snapping.
What about complex “L” shaped cuts?
You should use a jigsaw or a specialty vinyl cutter when you need to navigate around pipes or door frames. Believe it or not, trying to snap a complex cut often results in the core cracking in the wrong direction.
- Mark your cut lines on the face of the plank with a pencil.
- Use a blade with at least 20 teeth per inch for power saws.
- Support the plank fully to prevent vibration during the cut.
Key Takeaway: Mastering both manual snapping and power sawing techniques allows for rapid, waste-free installation.
| Cut Type | Recommended Tool | Pro Tip | |
|---|---|---|---|
| Straight Cross | Utility Knife | Score deep, snap fast | |
| Lengthwise | Circular Saw | Use a guide rail | |
| Notches | Jigsaw | High TPI blade |
Precision cutting is the hallmark of a B2B installation that requires minimal transition moldings to hide errors.
How to lock lifeproof waterproof rigid core vinyl plank flooring together?
Most rigid core planks use a “drop and lock” or “angle-angle” system where the long side is engaged first followed by the short end. Correct engagement of lifeproof waterproof rigid core vinyl plank flooring requires a click that is both heard and felt to ensure a waterproof seal.
How do you engage the long seam?
You should insert the tongue of the new plank into the groove of the installed row at a 30-degree angle. The reality is: if the plank doesn’t drop flat easily, there is likely debris in the locking channel that must be removed.
- Slide the plank horizontally to align the short end.
- Lower the plank while maintaining light pressure.
- Check for a seamless visual transition between planks.
How do you secure the short end?
You need to use a rubber mallet and a tapping block to gently seat the short end of the plank into its neighbor. You might be wondering: why not just use your hand? A mallet provides the necessary percussive force to fully engage the vertical lock.
- Tap lightly from the outside edge toward the seam.
- Ensure the end joint is perfectly flush with no height gap.
- Double-check the lock before moving to the next plank.
Key Takeaway: A dual-action locking technique—angle for the long side, tap for the short—creates the strongest mechanical bond.
| Action | Technique | Expected Result | |
|---|---|---|---|
| Long Side | 30° Angle Entry | Tight lengthwise seam | |
| Short Side | Vertical Tap | No “lipage” between ends | |
| Final Row | Pull Bar Tension | Closes wall-side gaps |
Mechanical integrity is achieved when the locking tabs are fully seated without being over-stressed by excessive force.
How to finish lifeproof waterproof rigid core vinyl plank flooring edges?
Finishing the project involves removing the spacers and installing baseboards or quarter-round moldings to cover the expansion gaps. Because lifeproof waterproof rigid core vinyl plank flooring is a floating system, these moldings must be nailed to the wall, never to the flooring itself.
Which moldings do you need?
You will typically require T-moldings for doorways and Reducers for transitions to thinner flooring types like carpet. Here is the kicker: matching the trim color exactly to the rigid core adds a level of professional polish that clients notice.
- Use T-moldings for spans exceeding 40 feet.
- Install End Caps against sliding glass door tracks.
- Opt for moisture-resistant moldings in bathrooms.
How do you seal wet areas?
You should apply a bead of 100% silicone caulk around the perimeter in rooms like kitchens or laundry areas. Think about it: while the planks are waterproof, the expansion gap is an open channel where spilled water can reach the subfloor.
- Use clear or color-matched silicone.
- Ensure the gap is clean before applying caulk.
- Smooth the bead for a professional, watertight look.
Key Takeaway: Proper trim and perimeter sealing protect the subfloor and provide the finished aesthetic expected in B2B contracts.
| Trim Type | Application | Attachment | |
|---|---|---|---|
| Baseboard | Room Perimeter | Nail to Wall | |
| T-Molding | Large Spans | Track or Glue | |
| Silicone | Wet Areas | Perimeter Gap |
The final finishing touches are what separate a DIY effort from a professional, long-lasting commercial installation.
How to maintain lifeproof waterproof rigid core vinyl plank flooring after?
Maintenance for these floors is straightforward, requiring only regular sweeping and occasional damp mopping with a pH-neutral cleaner. Even though lifeproof waterproof rigid core vinyl plank flooring is incredibly durable, avoiding abrasive chemicals will preserve the factory UV coating for years.
What cleaners should you avoid?
You must stay away from “mop and shine” products or wax-based cleaners that leave a dulling residue on the surface. But wait, there’s more: steam mops can potentially force moisture into the joints under high pressure, which may void some warranties.
- Use a microfiber mop for daily dusting.
- Choose cleaners labeled specifically for luxury vinyl.
- Rinse the mop frequently to avoid spreading dirt.
How do you prevent scratches?
You should install felt pads on all furniture legs and use non-rubber backed mats at entryways to prevent staining. The best part? Rigid core is highly scratch-resistant, but heavy sliding equipment can still mar the wear layer over time.
- Sweep up sand and grit daily.
- Use plywood sheets when moving heavy appliances.
- Replace worn-out furniture glides immediately.
Key Takeaway: Simple, non-abrasive cleaning routines maximize the ROI of the flooring by extending its service life.
| Task | Frequency | Recommended Tool | |
|---|---|---|---|
| Dusting | Daily | Microfiber Mop | |
| Damp Mopping | Weekly | pH-Neutral Cleaner | |
| Protection | As Needed | Felt Floor Protectors |
Consistent maintenance is the final step in ensuring the high-performance core delivers its promised value to the end user.
Conclusion
Mastering the installation of lifeproof waterproof rigid core vinyl plank flooring requires a commitment to precision, from the initial subfloor leveling to the final silicone bead. By choosing professional-grade materials and following these technical steps, you can provide clients with a floor that is as beautiful as it is durable. If you are ready to elevate your next commercial or residential project with industry-leading SPC and LVT solutions, contact us today to discuss your wholesale needs. At Adasea Flooring, we believe in building global partnerships through manufacturing excellence and uncompromised quality, bringing superior durability to every space we touch.
FAQ
Can I install this flooring over radiant heat systems?Yes, but you must ensure the surface temperature never exceeds 85°F to prevent the rigid core from becoming too soft.
What is the best way to clean up large spills?It depends on the liquid, but you should generally wipe it up immediately with a dry cloth followed by a damp mop to prevent a slip hazard.
Can I use a steam mop on rigid core vinyl?No, because the intense heat and moisture pressure can damage the locking system and the internal core over time.
What is the maximum room size before I need a T-molding?It depends on the specific product, but most manufacturers require a transition strip for any continuous span exceeding 40 to 64 linear feet.
Can I install heavy kitchen cabinets on top of this floor?No, because this is a floating floor system that must be able to expand and contract; cabinets should be installed first.